Sunday, November 3, 2013

Barber's 2013

We had a great weekend at the Barber Vintage Festival. Perfect weather, and a weekend full of old bikes, swap meets, racing, auction, shows, and friends. Both new and old!

Well the sliding completion date is becoming about as useless as a politician's promise. We were scheduled to leave Friday morning, and sometimes around Wednesday it became obvious this Cannonball bike would not be in the parade. But to much work had been done to leave it at home, so I assembled what I had, and we loaded the trailer. Two Germans and an American Indian.


Upon arriving, I find out there is no where to park the trailer, and I will have to take it to the motel. Now with 3 bikes and a truck and only 2 people, that is a problem. While we are trying to decide what to do, I see a sign for the AMCA show. So we decide to pull down there, and see if we can enter the bikes in the show. That way at least we can unload the trailer.


The nice folks from the Confederate Chapter of the AMCA said of course we could enter some bikes, and with the applications filled out, we dropped 2 of the bikes off.


The Indian's first appearance as Cannonball #96


and the 1967 BMW R50/2


The poor old 74 R90 got left out of the show, but we had to have something to ride back from the motel.
 
 
Hanging around the show was great. I got to meet some of the other Cannonballers, and check out there equipment. I got a lot of valuable information on what to carry, how to prepare, and what to expect. The effort that everyone puts in to this event is amazing, and it was great to be finally out of the garage with this bike. It was tough when they all headed over to do the parade lap, and I had to watch from the fence. Not much of a spectator.
 
 
But I did get a lot of positive feedback on the bike, and all the work done so far. But the biggest surprise of the weekend came when we went to pick the bikes up from the show Saturday afternoon. As I was pushing the Indian off the stand, I heard my name called.


and then for the 1960 / 70 class


It really felt good to get a little recognition for all the work on both of these bikes.


But this Blog, and this journey isn't about show bikes, its about riders. So we loaded the Indian up, and rode the 2 Germans into Birmingham for dinner, then rode around sightseeing a little, then on back to the motel.


A weekend like this always gets a person motivated. All the way back to GA, all I could think about was getting this Indian finished, getting it sorted out, and then prepping for 4100 miles. Daytona to Tacoma.

 Its going to be Epic!


Wednesday, October 9, 2013

Going to Barbers

I have already missed three self imposed deadlines for this project, and the sliding debut date is currently on the Barber Vintage Festival in Leeds Alabama in October. This festival is becoming huge, and is one of the biggest vintage events in the south, and I plan on having this 101 there. Then at the last moment, I find out they are going to let the Cannonball bikes do a parade lap. Now the pressure is really on.

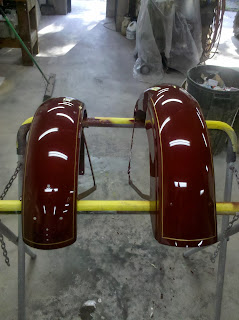
The past two weeks I have felt like those guys on the build shows, trying to meet some ridiculous deadline for no apparent reason, but sometimes a goal helps things move along. The sheet metal has been at David's for paint for awhile, and we are now waiting on correct tank emblems. After 3 sets, we are still out of luck, so I headed over and picked up everything but the tank to start fitment. It is really going to be nice.


The double sided felt seal has also been tough to get, but it arrived from Walker's, so the front end finally went together. All new bearings, races, and seals.


Rear fender and seat installed and it is starting to look like a proper Indian.


The chainguard and pipes provided a little challenge on fitment, but with a little cutting, welding, and nickel plating I got them installed.


With the festival this weekend, and still no tank decals, I called Dave and told him I had to have the tank as is, and we will finish it later. It is kind of disappointing not to have such a high profile piece looking good, but it is what it is.

I picked the tank up Sunday morning, and headed home for the final assembly. Still a lot to do before this weekend, but I did get it together enough for a profile shot for the web page.


Look for us at Barbers!


Friday, September 20, 2013

Motor Work: Going to School

I got the motor installed in the frame today, but man is that jumping ahead. These past 2 weeks have been productive, and VERY educational. Let me tell you about it.

My timing side crankcase was broken, and the previous caretaker had epoxied it back together. This was part of the discovery phase way back, and now it is time to address. I had sourced a case half and checked alignment, measured my crank, measured bores, skirts, and ring gaps, but was still tentative about the build. I had talked to George Yarocki a couple of times on the phone, and decided that if he had any time available I would go see him for an evaluation. I needed to get out of town for a few days anyway. He was agreeable, so I loaded up a box of motor parts, and Sunday am of labor day weekend I headed to CT. I would spend a day or two, meet the guru of all things 101, and put my lower end together. What could go wrong?


Our first order of business was a quick tour. It truly is amazing the amount of time and thought George has put into his place. Everything is labeled, orderly, and clean. Parts were everywhere, lots of stuff I had been trig to find. Next we unloaded my boxes, and inventoried what I had. Then started with the cases.

I had welded the baffles back in the cases, and welded them on the top side. I was not aware the piston skirts dropped that far down, and they were hitting at bottom center. Now the next item that reared its head, was the case halfs lined up perfect on the crank bearings, but the cylinder bores were off. After some discussion, we decided the sourced case for the timing side was a 37 cu-in and mine are 45 cu-in. Since that was only a small inconvenience, we set up to remedy the problem.
After making a fixture to center the cases in the mill, we bored the 37 case to a 45, and cut the high spots off my welds.


It took all day, but by the time we were through, we had a good set of matched cases, with new bearing races and good clean case bores! The long ride in the truck was now justified.
Next, I wanted some help setting up the crank. Centering the rod inside the crankcases is critical on these motors, and I wanted to learn about it. First we had to build a crank. I wanted a bullet proof bottom end, and had decided to use new pins, wheels, and rods for the cannonball. I assembled the crank with Truett Osboure flywheels and carrillo rods.

Carrillo Rods honed for new races.


On first assembly, we ran into problems. We were trying to measure the end play of the rod, but instead found the rod was hitting the crank and binding. So back apart it came, and we finally found the problem. I knew people have used Carrillo sport scout rods before, but these were defiantly hitting the crank. It seems the carrillos are just a little beefier than stock, and the TO flywheels are a little beefier that stock, and the combination rubbed. The stock flywheels have a recess dished into the side to allow the rod to clear, and the TO wheels don't, so a die grinder was enlisted to remedy this problem. A couple of attempts, then a couple of test assemblies grinding thrust washers, and we had a good crank.


Run out was way less than .001", and the assembly balanced nice!


George was adamant that the rollers in the bottom end all be miced. So I selected 120 rollers all within one tenth of a thousandth, or .0001". I was surprised how much variation there was in new rollers.
 
 
Next we measured the cases to determine the thrust washer thickness required to set the center of the rod in the center of the cylinder. The case depths are different, so each side gets a different washer. It took multiple attempts at measuring, grinding washers, and assembling to get the correct end play.

Measuring the case depth.


adjusting the thrust washers


 With all the tolerances correct, shaft end plays correct, crank true and balanced, and case half's matched I assembled the motor one last time. I really feel good about this motor now, and have defiantly learned my way around the inside of a 101 Scout motor. But best of all I got to learn from a true craftsman, and I thoroughly enjoyed every minute of it.

George had told me way back on Monday that I would assemble and take the motor apart 17 times before we were thru. I wish I would have counted, because I don't think he missed it far!

Friday, September 13, 2013

Its a Roller

Both front and rear wheels were completely disassembled, and all parts were media blasted. The front wheel was the correct 1929 unit with Timken roller bearings, and both bearings and corresponding races were replaced. The rear wheel was the 1928 style, with loose ball bearings. The bearings had been run loose, and had cut into the inner axle, and the ball races were pitted and cracked. Walker Machine was able to supply all these parts, and while still disappointed about not having the roller bearing hub, at least we are rolling on all new parts!

Wheels disassembled and cleaned.


The original bikes came with painted wheels, so I was determined mine would be painted. No stainless or powder coating on these. I primed the wheels before assembly, then laced and trued them, and shot them with a single stage black urethane.


Mounted some new K70 Dunlops, and I have a rolling chassis. Starting to look a little better.

Rebuild Continues

The frame was bent almost 2" out of square. The neck that hold s the forks was twisted, and the rear of the frame was bend to the left. I contacted Kent at GMD Computrack in Canton Ga. for some help. Kent has a slick laser measuring rack that determines three parallel axis, and all measurements are taken from these reference points. Once we knew where to apply pressure, Kent put the frame in his bending fixture and straightened her right up. Thanks Kent!


While Kent had the frame, it was time to tackle the fuel tank. The R&O Manual and a call to McMaster Carr had me ready to go. First step is to separate the tank


Then completely disassemble all the parts, and thoroughly clean. When I say thoroughly, I mean you cannot get them clean enough. The solder will run from the place you need tinned the most! Guaranteed.

With all the pieces clean, tin the old metal and solder it all back together.


and then


The tank was pressure tested and then a good coating of POR15 tank sealer for insurance. What a job that was! Why Indian decided to put the oil tank inside the gas tank with soldered construction is beyond me. I will defiantly have a plan B for the cannonball.


Thursday, September 12, 2013

The Rebuild Begins

The Rebuild Begins

Careful study of this 1929 motorcycle has fascinated me. This vintage is a little older than my norm, so I took a little more time to soak it all in. I quickly joined the 101 Association and bought the R&O Manual. It is not hard to miss the fact that this book is definitely a labor of love from all of those that contributed article, tips, photos, and drawings. Not a step by step guide, but a lot of information that has proven most valuable. Thanks to all that had a part in this book!

As I disassembled the bike, I would catch myself wondering why Indian did some of things the way they did, then remember that this vehicle is from the beginning decades of motorized transport. It truly is fascinating thinking on the "how's" and the "whys". To think that folks like Charles Franklin worked on the exact same components in their shop one night that I was working on in mine, is the appeal of the hobby for me.

So lets get started.

As the bike came apart, it became evident that the frame had jumped some ditches, sped down some rough roads, and even suffered a few impacts through the years.


The front bellcranks were bent, the forks were bent and broken, and the ball bearing and races in the fork mounts were shot. So I started with the forks by making a jig, cutting out the the broken sections of the fork, and replacing.


The forks all repaired


While concentrating on the front end, the handlebars had to be replaced.


The R&O Manual had detailed drawings of the correct bend, so I set out to bend my signature handlebars. After machining the old bars from the casting, I bent some new bars with a Chicago conduit bender. The first one was easy, but getting another to match took a while.


Sunday, September 8, 2013

The 2014 Motorcycle Cannonball.

My adventure begins here. A 1929 Indian 101 Scout.


The day after our Christmas party, the preparations began. Closer inspections were starting to indicate the bike may be in need of a little more TLC than first thought, but what the heck, I have a year and a half. Should be no problem. The goal is to make the 101 a reliable mount, as close to the original 1929 specs as can be, that will carry me 4000 miles across this great country.

 Follow the complete build thread at http://www.caimag.com/forum/showthread.php?15303-The-North-GA-Scout-Revival,